Showing posts with label Art. Show all posts

Saturday, 27 September 2014

Bar stories, Singapore


I've been extremely busy with work, but definitely learning to manage my time and learning the ropes with the most patient colleagues so I'm really thankful! Making a point to journal down my thoughts, don't ever want to lose this reflective slice of the virtual world I call home.

It's been quite a while since we all had a meet up, so it was good to catch up with the Lasalle mates, every meet up never fails to end us up in laughing stitches ♥ We had Bergs burgers @ Arab street, and strolled over to Artistry for some cakes and drinks but it was booked for a private event. There was sketch jamming going on, and we'll be back for that when Kat comes back from Aussie! (even though I can't sketch for nuts).

We then scurried along to Bar Stories. It has a pretty refreshing cocktail concept, where you convey your flavourful desires in words and the mixologist crafts it into a drink. There's no menu, and the magic lies in the ordering process....before the mixologist (yes) works up his cocktail spell.

"Fruity, sweet but passionate. Surprise me!" And indeed, the bartender presented me with a martini glass full of passionfruit with hints of rum, topped with smoked rosemary and its charred bits peppering on the concoction.


"I want Serenity in a drink" 
Oh, artists *winks at Ernest*

Bar Stories
57A Haji Ln, Singapore 189250 

Thursday, 16 January 2014

DIY fringe shirt,


I've been meaning to post this up for a while because I did this last semester before the year end holidays, so here it is! I really love how fringe tees give out a refreshing yet playful element to an outfit ensemble ♥ Always wanted to get one of my own, but I didn't think it was worth shelling out 30 bucks for a shirt when I could easily transform an old blouse to have a customized fringe. Loved it so much that I bought some cheap tank tops for experimenting with this easy DIY! Had a lot of fun trying this out, and I'm so glad it turned out pretty well :) Here are 4 easy steps to jazz up any old shirt or blouse, which can definitely be achieved in the comfort of your room.

Materials needed:
An old blouse/shirt of your choice (preferably cotton)
Ruler
Pencil/chalk for marking out measurements
Good pair of scissors
Pins or clips


Step 1: Cut off the bottom hem of the shirt, you won't need it. It's okay if the snip is uneven, so don't be afraid to make a mess! I like to use pins to secure both ends down so it's easier to cut, but I didn't have them at hand then but I used these cute hair clips which also do the trick.


Step 2: Measure a suitable length for the fringe to start (preferably not too short if you don't like it to be a cropped top) and mark out equal spaces between each snip. I used intervals of 1.5 cm between each cut, also ensure that the eventual number of snips is an even amount as you will pair them up to tie design knots. A soft 2B pencil or chalk would be suitable for making marks on the cotton shirt, I used a soft watercolour pencil and it was perfect.


Step 3: Be confident and snip away! I took out a bigger pair of scissors for this so the job would be faster and my snips would be straighter. If you like your fringe to be longer strips, you may adjust accordingly and cut upwards.


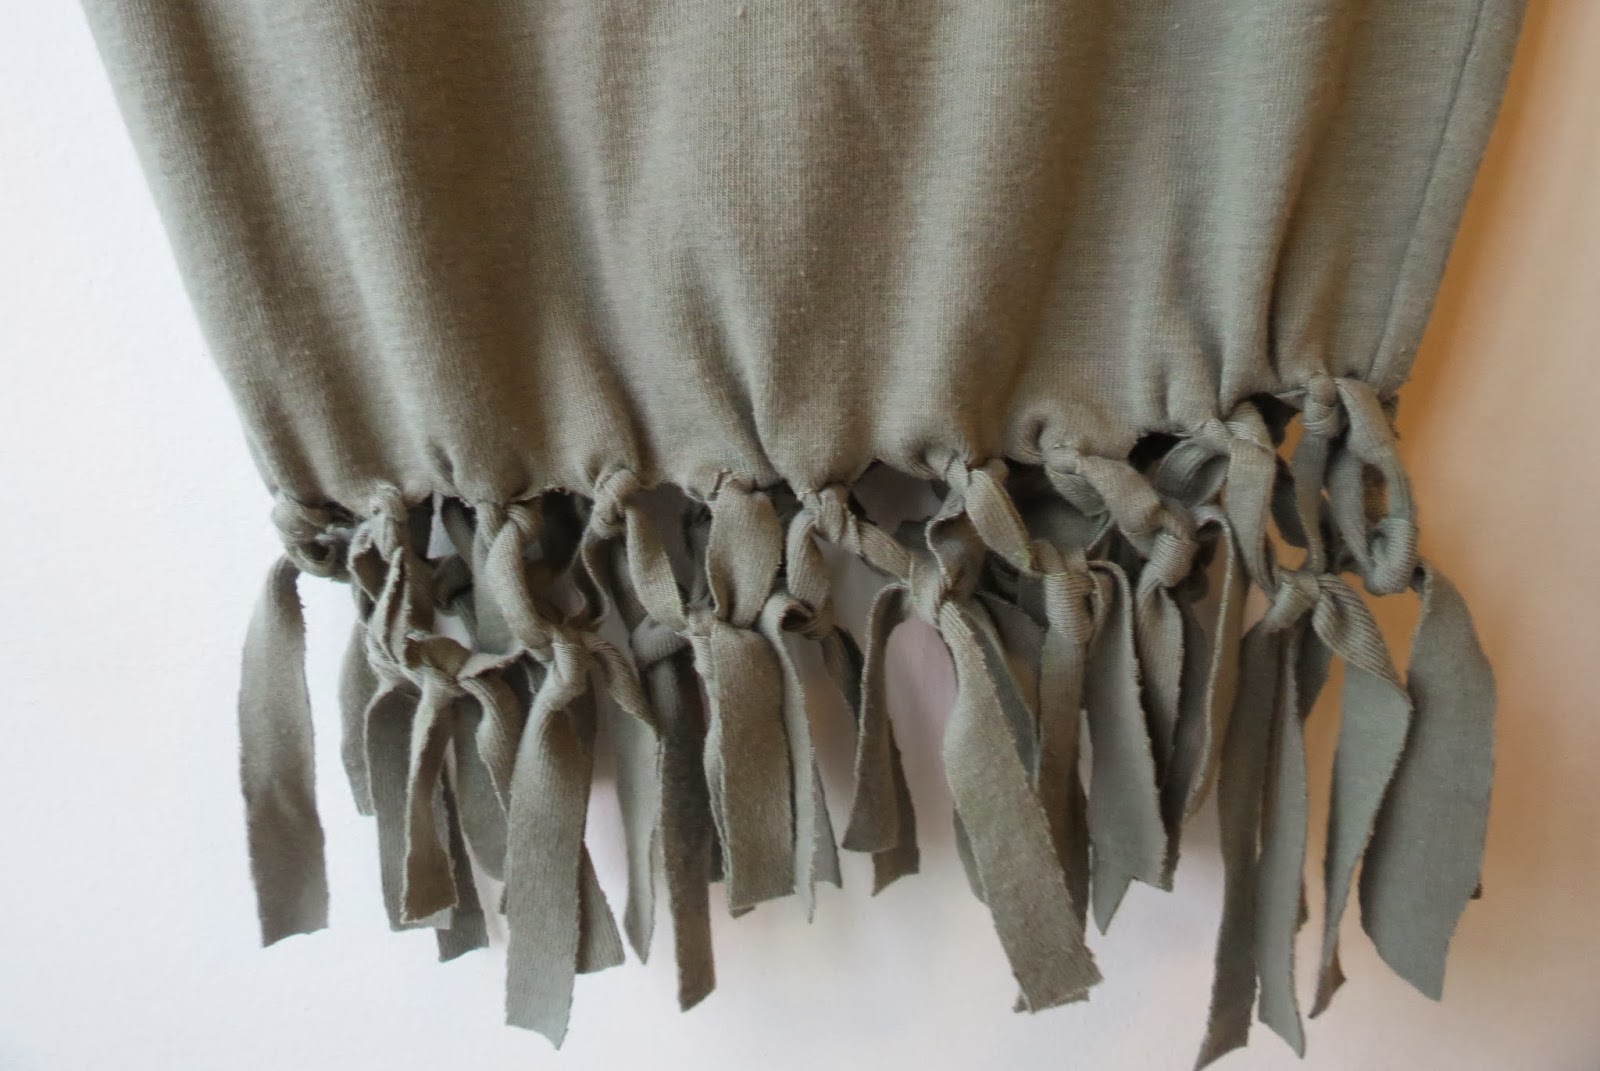
Step 4: Here's my favourite part - tying the knots in any customized design that you like! For this DIY, I did a simple 2-tier diamond design and hence only had 2 knot tiers. It's easier to do this when the shirt is hanging on the hanger so you do not get confused. I started by pairing up the fringe strips and tying a simple dead end knot twice (don't put too tightly if the shirt material is fragile), this helps to conceal the raw cuts you made between each strip. After you are done with the first round of tying, you move down to the next tier of knots. Using 2 fringe strips which originated from neighbouring (and hence not the same) first-tier knot, create a diamond shape of desired size and tie a double knot. When you are done, you can readjust the size or fix any material frays with a dab of clear nail polish.

You can create different designs, such as creating a third tier and so on. Would definitely love to try this out on different materials and designs when I have more time on my hands ♥ 


Pictures don't really do this beautiful DIY any justice - it's gorgeous in real life and injects such a playful element to any outfit ♥ Was initially quite shy of wearing this out because it's quite a twist from my everyday wear, but wore it one day and it felt so mood-lifting even on a blue and rainy Monday!


Ciao and happy DIY-ing! Will be away at Bali for a short getaway with my friends, can't wait :)

Wednesday, 24 July 2013

DIY Sparkle heels,

DIY sparkle heels

With the escapades of Winter and Spring frozen as memories, and me being back home on the sunny island of Singapore - I'm more than pleased to fall back into the reverie of DIY craft ♥ These dusty court shoes have been idling in my cupboard for quite a while, hence the sudden thought to jazz it up a little. What more beautiful a transformation from a dull pair of formals to a sparkle of silver to your plain outfit?

DIY sparkle heels old shoes

DIY sparkle heels old shoes

For this, I used my old pair of court shoes which has been faithfully serving me during my labourious council duties and office stints. Coupled with a few other materials from Art Friend (favourite store of all time!) such as Mod Podge (seriously useful, you might want to purchase a bigger bottle as an investment), an old brush, sparkly glitter any colour of your choice and Hi-shine glaze. It gets quite messy so do line the table with some rough papers, once you're done let the glittering begin!

DIY sparkle heels mod podge

Glitter

Glitter macro

DIY sparkle heels items needed

1. Line an old plastic tub with aluminium foil, and mix the Mod Podge and glitter in the proportions of 2:3. If you wish, you may add more glitter to thicken the mixture but this was what I did after experimenting with it :)

DIY sparkle heels glitter mod podge

DIY sparkle heels paintbrush

DIY sparkle heels application

DIY sparkle heels applying

2. Ensure that your shoes are clean and dry - and begin to adorn the surface of the shoes (you might want to use gloves if you're afraid of being messy, I love the messy craft feel though!)

3. Allow it to dry for an hour or less, and coat it with a second layer. This helps to strengthen the coat and cover the gaps you missed the first time. If you wish, you may coat it a third time.

DIY sparkle heels first coat

4. Allow the shoes to dry for an extended period of time, e.g. 1-2 days and spray it with the Hi-shine glaze to hold the glitter coat together and ensure that the shine doesn't fade! You might want to do this outdoors because of the glaze fumes. Dry it for an hour and viola, you're done! Perfect for dinner dates with a black sleek dress ♥ 

DIY sparkle heels final product

Update: took a picture with my outfit, whilst playing with Mirrorgram!


Ciao!

Monday, 29 October 2012

DIY tribal nails

Gold details tribal nail design

Manicures are so pampering, but it's hard to squeeze time and money out for such luxury regularly. The more intricate your nail designs, the more expensive it'll be - so why not do up your own? The best part is that it's so simple, and you won't even need to limit your choices to a commercial design book ♥

Black and mint nail polish - no frills $3 each
Gold OPI - Free from a local fashion event
Hair pin - from home
Nail art dotter - $1 (picked up from a local art store) 
                         (Optional, I didn't use this)

Manicure tools diy

Gold details tribal nail design

Gold details tribal nail design

For this design, it's really a simple tri-step process. Base mint coat, with a middle strip of gold and then the intricate details with the black nail polish in the middle. (With drying time in between coats as per a normal manicure) What I would like to share would be how to do up the details with easily available tools you have at home! For me, I work best with the tips of a hair pin. With a steady hand and patience, you can come up with a lot of designs ♥ The back of the hairpin is good for wavy designs, while the front tip is good for dotting - you can adjust the size of the dots by the application pressure. It's not the best tool around, but it's so inexpensive and you can experiment around without a cent! If you mess up, you can purchase one of those nail markers, which can last for pretty long. Other alternatives include a nail art dotter from a local art store or nail shops, or using a traditional pencil with a pushpin stuck onto the back eraser portion.

Gold details tribal nail design

Nail art design

Nail art design

Nail art design

Gold details tribal nail design

Gold details tribal nail design

I have heard a lot of raving about using Scotch magic tape to do up clean neat lines (good for stripes) on nail designs so maybe I'll try that next time, ciao!

Sunday, 21 October 2012

DIY ombre denim shorts,


Dip dye shorts have been quite a sensation recently, and what better to jazz up a pair of mundane denim shorts than to create the Ombré effect ♥ The french word ombragé stems from the English word umbrage, which simply means shaded. I love using stark contrasting colours for this, because it eventually creates a soft gorgeous blend - no matter how different the colours may be at first!


Fabric dyes: $6 each
Denim shorts:  Old pair collecting dust in my wardrobe
Time taken: Less than an hour

I got my dyes from Art Friend (members discounts make my day) but you can get any cheap dyes you find at your local art store. Take note that some cheap dyes may not produce very vibrant colours, so it's good to invest in some good ones! I used Flamingo pink and Ocean blue for this DIY. Here, I've chosen to dip-dye my pair of old denim shorts, which are extremely loose for me, it's probably at least a quarter larger than my actual size. Also, the time taken might vary because it takes some time to dry.

Step 1: Dampen the pair of clean shorts, preferably immersing it in warm water for about 5 minutes. This helps the shorts to take in the dye a lot better later.


Step 2: Create your dye potions, follow the instructions given on the packets and make sure the dye is equally dissolved in the water (different amounts give rise to various proportions) You may also adjust the intensity of the colours by adding more water. Another good tip is to make the water warm so the dye is absorbed faster, and to use non-staining pails!


Step 3: Dip-dye half of the shorts into the darker potion, if I dip it after the lighter potion the colour may run down and affect the intensity and I didn't want that. If you want brighter colours, leave it inside longer! Patting it doesn't help.


Step 4: Leave it out to dry, but not in direct sunlight because strong sunlight may cause the effect to fade. I placed mine on a hanger and left it in the shower for a day.

Voilà, fini.


Tip: Please wear long gloves so the dye doesn't stain when you submerge your hands in, I had different coloured stained hands for a week! (Along with my newly manicured gelish nails)


Going one step ahead, you could create the rugged look by cutting the ends of your denim shorts and tearing the frayed ends. If you make any mistakes (mess ups are natural), you could use clear nail varnish to patch up the ends or just let it be! I'm tempted to make my own with an old pair of denim black jeans, and using the leftover material for a new Macbook sleeve or a pencil case. I'll share more on that if I ever get down to doing it ♥ 
Related Posts Plugin for WordPress, Blogger...