Showing posts with label Do it yourself. Show all posts

Thursday, 16 January 2014

DIY fringe shirt,


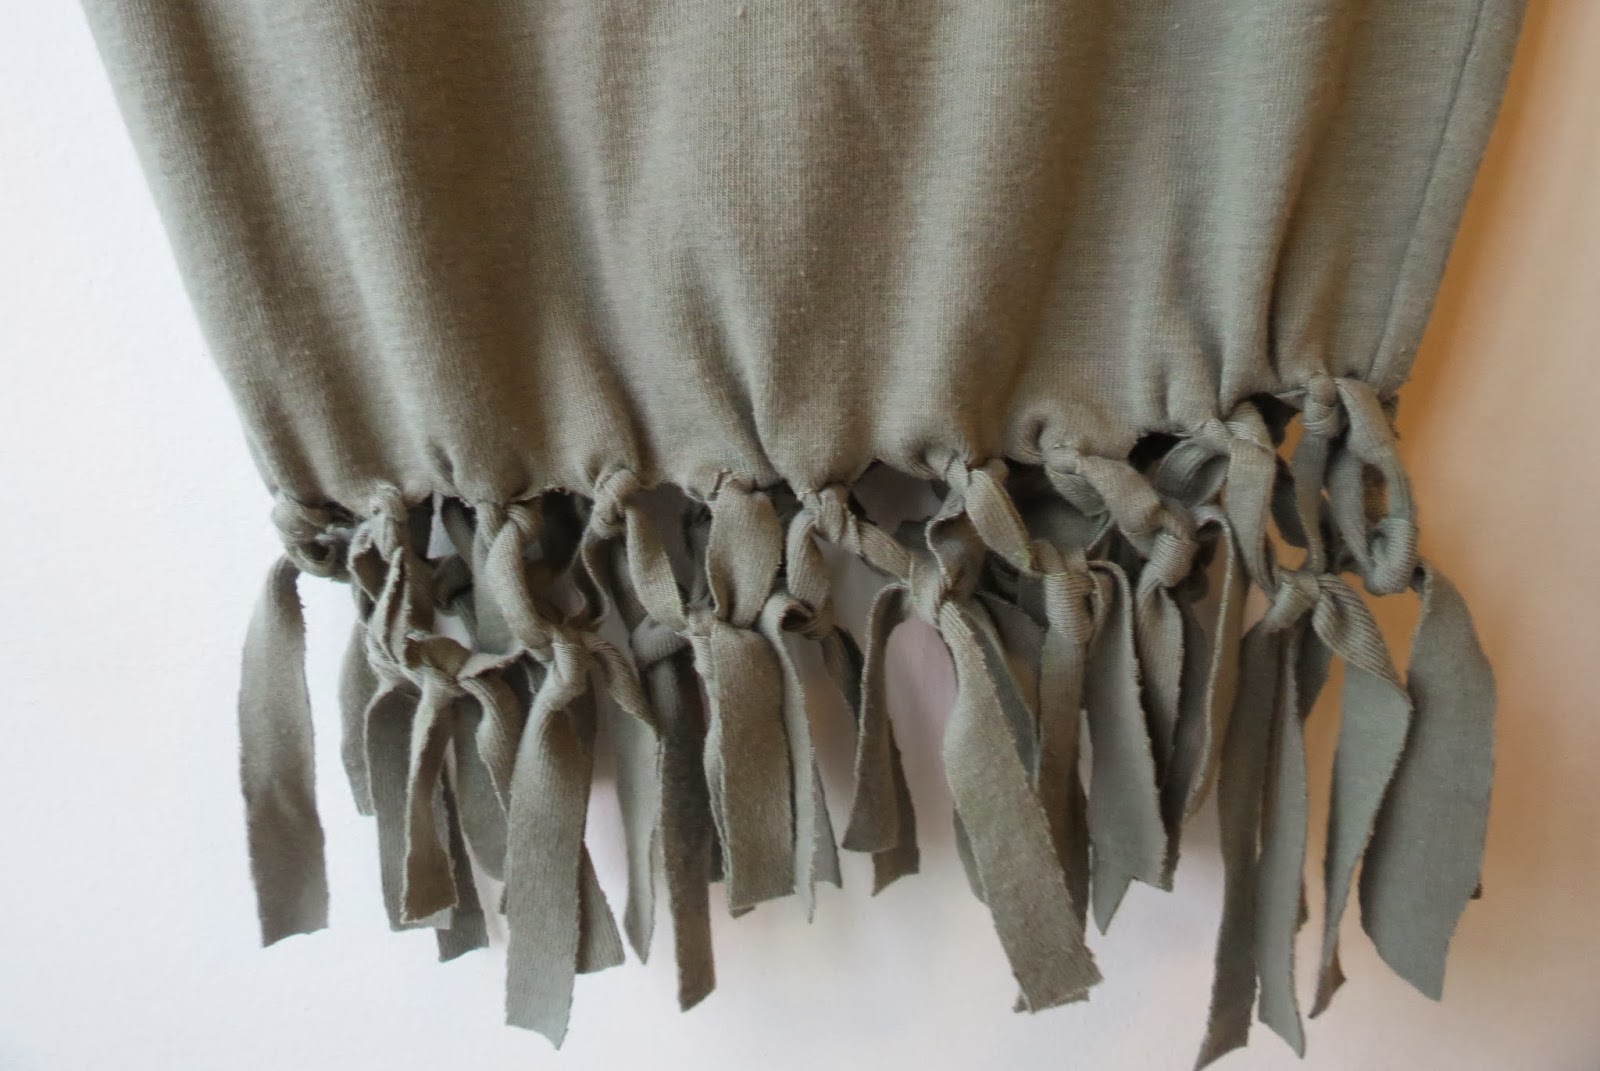
I've been meaning to post this up for a while because I did this last semester before the year end holidays, so here it is! I really love how fringe tees give out a refreshing yet playful element to an outfit ensemble ♥ Always wanted to get one of my own, but I didn't think it was worth shelling out 30 bucks for a shirt when I could easily transform an old blouse to have a customized fringe. Loved it so much that I bought some cheap tank tops for experimenting with this easy DIY! Had a lot of fun trying this out, and I'm so glad it turned out pretty well :) Here are 4 easy steps to jazz up any old shirt or blouse, which can definitely be achieved in the comfort of your room.

Materials needed:
An old blouse/shirt of your choice (preferably cotton)
Ruler
Pencil/chalk for marking out measurements
Good pair of scissors
Pins or clips


Step 1: Cut off the bottom hem of the shirt, you won't need it. It's okay if the snip is uneven, so don't be afraid to make a mess! I like to use pins to secure both ends down so it's easier to cut, but I didn't have them at hand then but I used these cute hair clips which also do the trick.


Step 2: Measure a suitable length for the fringe to start (preferably not too short if you don't like it to be a cropped top) and mark out equal spaces between each snip. I used intervals of 1.5 cm between each cut, also ensure that the eventual number of snips is an even amount as you will pair them up to tie design knots. A soft 2B pencil or chalk would be suitable for making marks on the cotton shirt, I used a soft watercolour pencil and it was perfect.


Step 3: Be confident and snip away! I took out a bigger pair of scissors for this so the job would be faster and my snips would be straighter. If you like your fringe to be longer strips, you may adjust accordingly and cut upwards.


Step 4: Here's my favourite part - tying the knots in any customized design that you like! For this DIY, I did a simple 2-tier diamond design and hence only had 2 knot tiers. It's easier to do this when the shirt is hanging on the hanger so you do not get confused. I started by pairing up the fringe strips and tying a simple dead end knot twice (don't put too tightly if the shirt material is fragile), this helps to conceal the raw cuts you made between each strip. After you are done with the first round of tying, you move down to the next tier of knots. Using 2 fringe strips which originated from neighbouring (and hence not the same) first-tier knot, create a diamond shape of desired size and tie a double knot. When you are done, you can readjust the size or fix any material frays with a dab of clear nail polish.

You can create different designs, such as creating a third tier and so on. Would definitely love to try this out on different materials and designs when I have more time on my hands ♥ 


Pictures don't really do this beautiful DIY any justice - it's gorgeous in real life and injects such a playful element to any outfit ♥ Was initially quite shy of wearing this out because it's quite a twist from my everyday wear, but wore it one day and it felt so mood-lifting even on a blue and rainy Monday!


Ciao and happy DIY-ing! Will be away at Bali for a short getaway with my friends, can't wait :)

Sunday, 10 November 2013

DIY lip scrub,

DIY Lip scrub

When I was overseas, the cold winter was often accompanies by the typical sight of dry chapped lips. Now, even though I'm back home in eternal summer (aka Singapore), spending copious amounts of time in air conditioning is inevitable and this can be really drying for the lips. This makes it extremely hard for lip balm or lipstick to stay on, and having bits of dead skin on your lips is not only unsightly but also really uncomfortable. I always can't resist peeling them and they only get worse towards the end of the day. Brands like Lush and The Body shop have lip exfoliants - but for such a trivia matter, they come with a heavy price tag. So why not make this DIY simply with four ingredients which you can find lying around your kitchen!

Ingredients: 
2.5 tablespoon olive oil
2 flat tablespoon sugar
1 teaspoon honey
1/2 teaspoon of lip balm (for flavour)

DIY Lip scrub ingredients

The amount of each ingredient can be varied, depending on how much you want to make (tip: make some for the weeks ahead by keeping it sealed in an airtight container). Olive oil can be substituted by other forms of oil such as Vitamin E capsules or Primrose oil. White sugar is used instead of brown sugar because it's grainer and gives a better exfoliating finish, while honey helps to bind the concoction together and sweetens the deal. I added in some lip balm to make the consistency smoother, and to give it a bit of colour and cranberry flavour bonus! You can try adding Vaseline if you want the consistency to be extra smooth :)

DIY Lip scrub ingredients

Mix the ingredients and viola, DIY lip scrub! Massage them on your lips gently for about 30 seconds and pucker up ♥

DIY Lip scrub

Ciao my lovely readers!

Sunday, 21 October 2012

DIY ombre denim shorts,


Dip dye shorts have been quite a sensation recently, and what better to jazz up a pair of mundane denim shorts than to create the OmbrĂ© effect ♥ The french word ombragĂ© stems from the English word umbrage, which simply means shaded. I love using stark contrasting colours for this, because it eventually creates a soft gorgeous blend - no matter how different the colours may be at first!


Fabric dyes: $6 each
Denim shorts:  Old pair collecting dust in my wardrobe
Time taken: Less than an hour

I got my dyes from Art Friend (members discounts make my day) but you can get any cheap dyes you find at your local art store. Take note that some cheap dyes may not produce very vibrant colours, so it's good to invest in some good ones! I used Flamingo pink and Ocean blue for this DIY. Here, I've chosen to dip-dye my pair of old denim shorts, which are extremely loose for me, it's probably at least a quarter larger than my actual size. Also, the time taken might vary because it takes some time to dry.

Step 1: Dampen the pair of clean shorts, preferably immersing it in warm water for about 5 minutes. This helps the shorts to take in the dye a lot better later.


Step 2: Create your dye potions, follow the instructions given on the packets and make sure the dye is equally dissolved in the water (different amounts give rise to various proportions) You may also adjust the intensity of the colours by adding more water. Another good tip is to make the water warm so the dye is absorbed faster, and to use non-staining pails!


Step 3: Dip-dye half of the shorts into the darker potion, if I dip it after the lighter potion the colour may run down and affect the intensity and I didn't want that. If you want brighter colours, leave it inside longer! Patting it doesn't help.


Step 4: Leave it out to dry, but not in direct sunlight because strong sunlight may cause the effect to fade. I placed mine on a hanger and left it in the shower for a day.

VoilĂ , fini.


Tip: Please wear long gloves so the dye doesn't stain when you submerge your hands in, I had different coloured stained hands for a week! (Along with my newly manicured gelish nails)


Going one step ahead, you could create the rugged look by cutting the ends of your denim shorts and tearing the frayed ends. If you make any mistakes (mess ups are natural), you could use clear nail varnish to patch up the ends or just let it be! I'm tempted to make my own with an old pair of denim black jeans, and using the leftover material for a new Macbook sleeve or a pencil case. I'll share more on that if I ever get down to doing it ♥ 

Saturday, 17 December 2011

DIY Red velvet cupcakes,


Spent an afternoon two weeks ago baking cupcakes after raving about the Red velvet ones during the exam period. Took inspiration from a bunch of Martha stewart's recipes (you know you want to click on the link) and hey presto, Red velvet cupcakes with blueberry fillings and cream toppings with walnut. I promised to share the recipe so here goes:

2 1/2 cups of cake flour, sifted
2 tablespoons of Cocoa powder (I used Van Houten pure soluble cocoa)
1 teaspoon vanilla extract
1 teaspoon of salt
3/4 cups of sugar
1 cup of vegetable oil
2 eggs, room temperature
Beet root juice (for red colouring)
1 cup buttermilk
1 1/2 teaspoons of baking soda
2 teaspoons distilled white vinegar 
A handful of blue berries
A packet of shelled walnuts

Modern recipes usually use deep red colouring but beet root gives it that organic au naturale feel, rather than having chemicals doused into the batter. You can use your hands to juice out the pigment betains from the beet (gloves are highly encouraged), and you add as much as you want until you achieve the desired shade :) And because I used beet, the baking soda would have to be reacted with vinegar first because the alkaline environment would change the red pigments to a more bluish state. (Correct me if I'm wrong here!) I'll let the pictures do the talking.


If you can infer the consistency of the batter, it was rather moist. The batch didn't turn out very fluffy, perhaps due to insufficient mixing (time to invest in an electric mixer hee) I still have so much to learn. As for the consistency of the cream, electric mixers will definitely give you the best (I mixed manually)


Christmas season is coming, and I'm so excited! The Christmas tree is up, but the feeling hasn't really sink in yet. And even though it really means the advent of the upcoming school term, it's one of my favourite holidays where we can all give thanks for the year and look forward to renewed promises to the next ♥ 

P.S. Do share your baking experiences or recipes if you have any, would love to know!
Related Posts Plugin for WordPress, Blogger...